Phone:
(516)349-8800
Physical address:
958 W Jericho Turnpike, Smithtown, NY 11787
50 Years in Business | Est. 1975
50 Years in Business | Est. 1975

You’ve just finished a renovation, and the imported marble foyer that looked stunning in the showroom is now covered in a cloudy film. Grout lines look chalky, and stubborn adhesive clings to the floor where protective boards once sat. Post construction stone cleaning Long Island property owners need goes beyond a standard final cleanup, because each residue calls for a different removal method.
The wrong cleaner can leave permanent etching on marble, limestone, or travertine. This guide explains how to identify your material and the residue on it. You’ll also learn which treatments are safe and when professional cleaning is worth the cost.
Post construction stone cleaning Long Island projects involve removing renovation residue from tile, natural stone, and nearby finished surfaces without damaging their appearance. The process combines careful dust extraction, material identification, targeted cleaning, and thorough rinsing.
Your floor may have several types of residue at once. Cement dust can scratch polished surfaces, grout haze can leave a milky film, and adhesive can remain tacky long after protective coverings are removed. A successful cleanup addresses each problem separately rather than applying one aggressive chemical across the entire floor.
If you’re planning a renovation or preparing a property for handover, professional post-construction cleaning services can help you address the final cleanup while protecting finished surfaces. The exact treatment should depend on the materials installed, the products used during construction, and how long the residue has been present.
Acidic cleaners can react with calcium carbonate in marble, limestone, and travertine, creating etching that looks like dull, pale, or rough patches. Even when the surface appears clean, its original polish may already be damaged.
Vinegar, lemon juice, acidic bathroom cleaners, and certain grout removers can cause this reaction. Calacatta marble, with its distinctive veining and polished finish, is particularly unforgiving when an unsuitable product is used. Bluestone also requires material-specific care because its composition and finish can vary.
A pH-neutral stone cleaner is generally the safer starting point for routine cleaning. It removes ordinary soil without relying on the acidic chemistry that can attack sensitive stone. However, neutral cleaning alone may not dissolve cured grout, epoxy, or construction adhesive. Before using any chemical, test it in an inconspicuous area and follow the product label. If you cannot identify the stone or residue, avoid experimenting with stronger products.
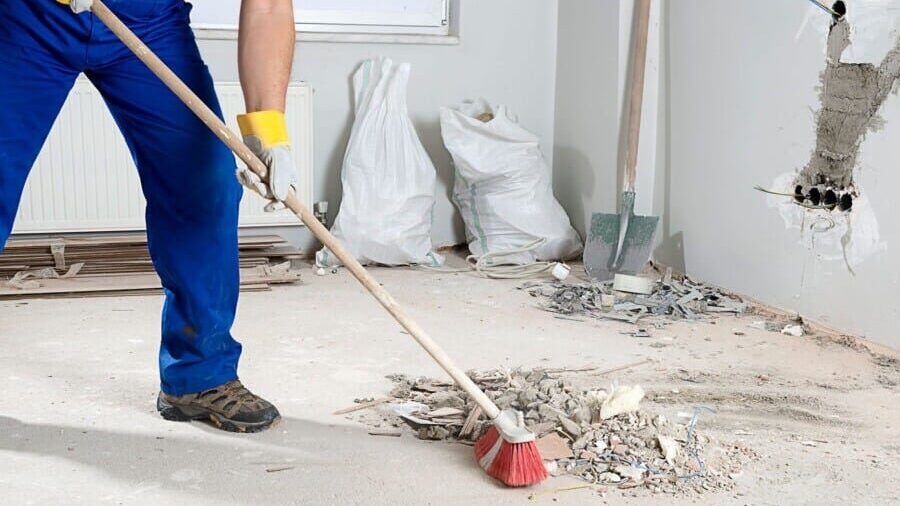
Grout haze is a thin layer of grout residue left on the tile surface after installation. The correct removal method depends on whether the grout is cementitious or epoxy-based and whether the surface is acid-resistant.
Cementitious grout contains cement and can leave a chalky film when installation residue dries on the tile face. Fresh residue may respond to clean water and gentle wiping, provided the grout has reached the appropriate stage for cleaning.
Older haze is more difficult because the residue can harden and bond to the surface. On compatible ceramic or porcelain tile, a manufacturer-approved grout-haze remover may help. On marble, limestone, and travertine, an acidic remover can etch the stone, so a stone-compatible, non-acidic treatment is the safer option.
If you need grout haze removal on marble in Suffolk County, the technician should identify the material, test the proposed treatment, and check the finish before proceeding. Persistent haze may require specialist mechanical cleaning or professional stone restoration.
Epoxy grout contains resin that makes it more resistant to chemicals and moisture than traditional cement-based grout. Once cured, its residue can be particularly difficult to remove with water or ordinary household cleaners.
Epoxy-haze removal may require a compatible epoxy residue remover, controlled dwell time, and careful mechanical agitation. The product must be suitable for both the grout and the tile or stone. Using the wrong solvent or abrasive tool can damage the finish while leaving some residue behind.
Construction adhesive removal from tile requires identifying the adhesive before selecting a solvent or mechanical method. Tape glue, carpet film residue, Ram Board adhesive, silicone, and hardened construction glue do not all respond to the same treatment.
Start by removing loose material without scratching the surface. A plastic scraper may help lift residue from a compatible finish, while a suitable solvent may soften remaining adhesive. Always check the product label and test for discoloration, finish changes, or other adverse reactions.
Protective boards and temporary floor coverings can leave sticky residue on wire-brushed hardwood. The textured grain makes removal more difficult because adhesive can settle into the grooves.
Use a finish-compatible cleaning method and avoid soaking the wood. Excess moisture can affect wood flooring, while untested solvents may discolor its finish or leave dull patches. If the adhesive has hardened or covers a large area, professional assessment can help determine whether cleaning alone will work.
If your renovation involves both tile and wood flooring, remove mortar from hardwood floors only after confirming what the residue is and how the flooring was finished. Mortar and adhesive require different treatments, and aggressive scraping can permanently mark the wood.
A professional cleaning process begins with inspection, not chemicals. Your technician should identify the surface, determine the likely residue, and test a suitable method before treating the full area.
A typical process includes:
Chemical safety also matters. Appropriate PPE, such as gloves and eye protection, should be selected according to the product and task. OSHA workplace safety requirements may apply to relevant construction and cleaning activities, while EPA guidance and applicable product requirements can help inform responsible chemical handling and disposal.
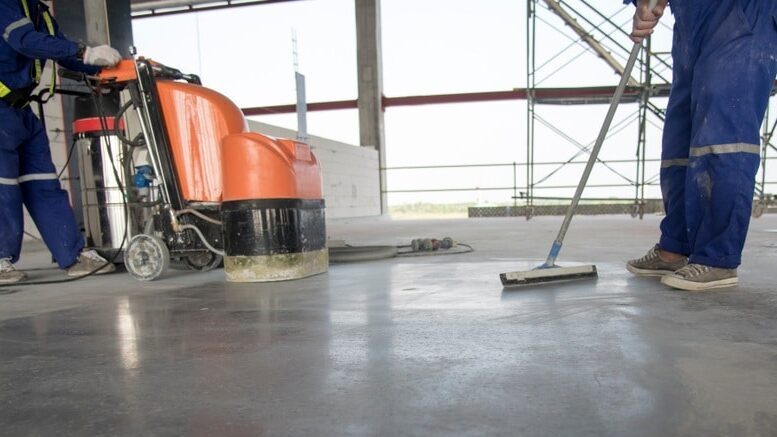
Sealing is worth considering when the stone or grout is suitable for a penetrating sealer, but it should only happen after cleaning is complete and the surface is sufficiently dry. A sealer can help reduce the absorption of certain liquids and contaminants, although it does not make stone completely stain-proof.
Before sealing, confirm that grout haze, adhesive, and other residue have been removed. Applying sealer over contamination can interfere with the finish and make later cleaning more difficult. The correct drying period depends on the material, moisture conditions, and sealer manufacturer’s instructions.
Not every surface needs immediate resealing. Some materials are less absorbent, and certain finishes or factory treatments may affect the decision. Check the stone supplier’s recommendations before applying another product.
The wrong removal method can turn a manageable cleanup into an expensive restoration project. Avoid these common mistakes when dealing with newly installed stone, tile, or finished wood.
It depends on the grout. Cementitious grout is usually wiped once it firms up, with remaining haze addressed within the product’s recommended window. Epoxy grout requires prompt cleanup before it cures. Always check the manufacturer’s instructions, as cleaning too early can pull grout from the joints.
Grout haze is a thin film left on tile after installation. Efflorescence is a powdery white deposit caused by dissolved salts carried to the surface by moisture. It may return if the underlying moisture source remains. Dry brushing is often the first step, but avoid acidic removers on acid-sensitive stone.
Professional cleaning is worth considering for expensive natural stone, extensive construction residue, or unknown adhesives and grout products. Light dust and ordinary surface dirt may be manageable with a compatible pH-neutral cleaner. Specialist treatment is advisable when incorrect products or techniques could permanently damage the stone’s finish.
Schedule stone cleaning after grouting, painting, and dusty work are complete, but before sealing, furniture delivery, and final inspection. Allow enough time for testing, drying, and any required polishing. If other trades still need access, protect the cleaned floor to prevent fresh dust and debris from settling.
Ask how the contractor identifies stone types, tests cleaning products, removes stubborn residue, and protects polished finishes. Confirm what the quote includes and whether restoration is priced separately. Request proof of insurance and experience with similar materials. A reliable contractor should explain the proposed method and its limitations.
Post-construction stone cleaning cost depends on the area size, stone type, residue severity, and whether restoration is needed. Marble with hardened epoxy may require more work than porcelain with light grout haze. Request an assessment and confirm whether testing, residue removal, polishing, and sealing are included in the quote.
If renovation residue is affecting your floors, arrange an assessment before trying stronger chemicals. Post construction stone cleaning Long Island property owners can rely on identifying the material and choosing a method that removes contamination without compromising the finish.
At XYZ Cleaning, we provide professional post-construction cleaning to help get your property ready for use. Our trained team removes fine dust with HEPA-filtered vacuums and cleans marble, tile, and hardwood using methods suited to each surface and finish.
Don’t risk permanent acid etching on imported stone. Let our trained post-construction specialists safely extract grout haze and construction residue.